Your Guide to Blur Text and Faces in iPhone Videos: Most types of media can be shared with family and friends, but you might want to think twice before letting everyone see your private stuff. This is very important if the things you’re sharing have private information on them, like pictures, phone numbers, or social security numbers of you and your family.
In photos, it’s easy to blur or scratch out faces and private text. But it can be hard to hide this kind of information in videos or screen recordings, especially if you don’t have the right software or training. We will show you the easiest way to blur faces and text in these videos right from your iPhone in this post.
How to blur something in an iPhone video
Apple doesn’t make a built-in tool for iPhone users to blur private parts of videos, like faces and text. While there are many third-party apps that can do this, we’ll stick with the Blur-Video app from the App Store because it’s simple and easy to use. You can use blur or pixelation effects in this app to hide text or faces in videos for free. The best part is that all of its features are available to everyone without any extra costs.
A quick guide:
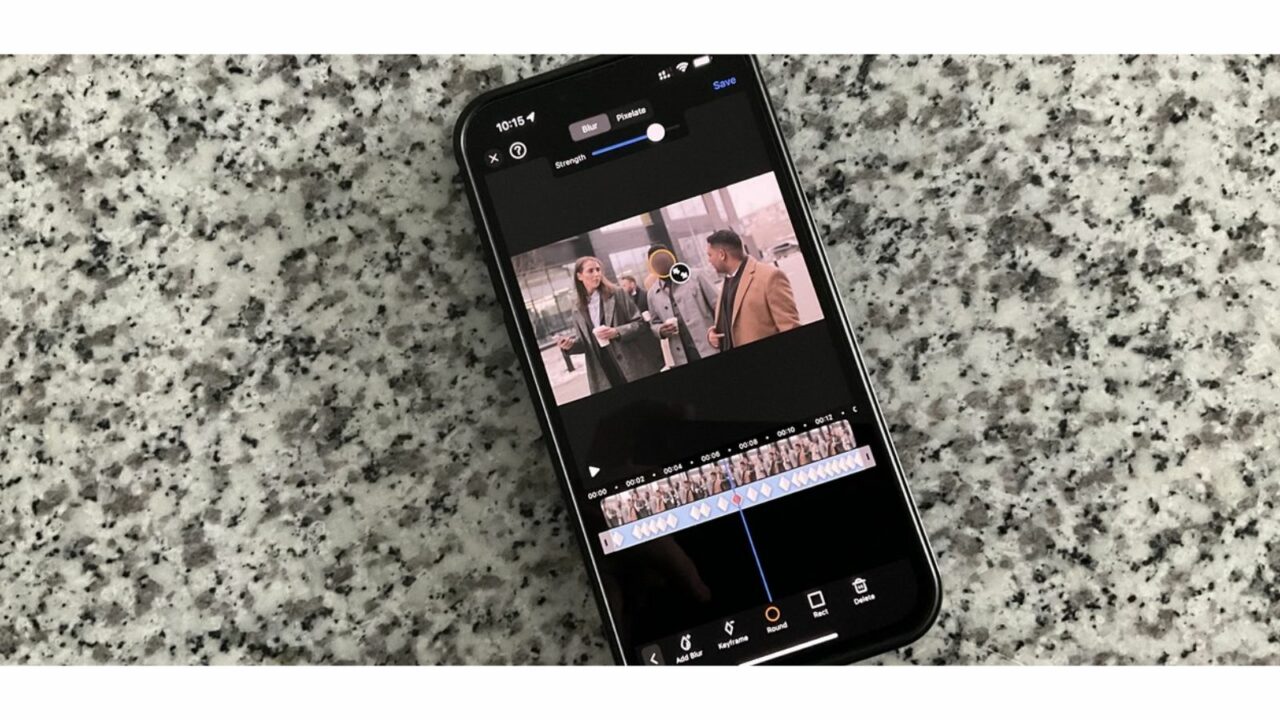
To blur parts of a video, open the Blur-Video app, press “Start,” choose a video, and then pinch outwards to make the video bigger into multiple frames. Find the frame where the object first shows up > Pick either Blur or Pixelate > You can change the size, shape, and position of the blur box after you add Blur. Keyframes let you change the shape and size of the blur for multiple frames of moving objects.
How to use GIFs:
First, get the Blur-Video app from the App Store. This is what you need to do to blur parts of a video.If you want to use the Blur-Video app, go to the App Library and open it. Press the “Start” button at the bottom of Blur-Video.
To change a video, you’ll be asked to pick one from your Camera roll. Tap on the video you want to change on this screen.The video you chose will now be shown in the top preview. You can use the video seeker at the bottom, which has thumbnails for each frame, to find the part of the video where you want to add the blur. You can play the video once by tapping the Play button before you add the blur box.
When you find the frame where the blur needs to be added, pinch the seeker tool outwards to make the video bigger. This will make it easier to find the exact frame where the content you want to hide starts to show up. You should pinch as far outward as you can to land on the exact frame. One second of your video will be split into 30 frames, which will make it easier to hide things as they appear. This will be clear when you see the “3f”, “6f”, “9f”, and other frame labels above the thumbnails.
Once the video has been split into multiple frames, use the seeker tool at the bottom to move to the exact beginning frame where you want to use the blur tool. We’re trying to hide the name and picture that show up when you open the iOS Settings app in this video. So, we try to find the frame where we can see the name for the first time.
At this point, choose the Blur or Pixelate tab from the menu at the top to add the blur effect you want. Blur makes a soft overlay that can be useful for hiding text in videos. Pixelate, on the other hand, uses big blocks of pixels to hide photos and text.
How to Find Your Blocked List on iPhone
Now, click the “Add Blur” button in the bottom left corner to make this frame blurrier.In the bottom left corner of the screen, a new blur layer and a blur circle will show you the timeline of the frame.You can tap on the Rect option in the bottom row to turn this blur box from a circle into a rectangle.
Once you’ve chosen the blur shape you want, move the blur box on the video preview to the part of the video you want to blur. Use the blur overlay from the first frame where the object appears for the best results, as shown in steps 3–4.To change the size and shape of this box, drag the diagonal arrow icon in and out until you get the result you want. Once this box is the right size, you can drag it to change where it is in relation to the part you want to hide.
Now, move the seeker to the next frame to the left to see if the face or text moves. Instead of going through the steps below, you can go straight to step 12 if the thing you want to blur is still. If you have moving content, on the other hand, you will need to use the Keyframes tool to add the blur effect to each frame.
You can blur different frames with keyframes so that the thing you want to hide stays hidden during the whole video when it plays normally. You can move on to the frame where this thing moves to a different place after putting the blur box in the first frame. In this frame, go to the bottom bar and tap on Keyframe.
As soon as you click on Keyframe, a red diamond icon will show up in the blur timeline below the thumbnail of the frame. After making a keyframe, you can change the blur box’s position, shape, and size to hide only the part of the video you want.You will have to do steps 8–9 again and again to add more keyframes to the video and change the shape and size of the blur for each one. Your adding keyframes will depend on how much the object you want to hide moves.
After adding the keyframes needed to hide the moving object, you can change how long the blur effect lasts so it doesn’t show up in frames that aren’t needed. You can skip this step if the thing you want to blur stays where it is until the end. If it doesn’t, look for the frame in the video where this object goes away. Now, pinch in until you can see the gray end on the right side of the blur timeline. When it does, move this gray end to the last frame you want the blur to show up and drag it left.
If you want to blur more than one object, you can do steps 4–11 again to achieve this. You can go straight to the next step if not.
After using keyframes to add the blur effect to the objects you want, you can either tap the Play icon or manually move through the frames to see how well the blur worked.
Press the Save button in the upper right corner when you’re done making changes. Now, your video will be processed and saved right to the Camera roll on your iPhone. Launch the Photos app on your phone to see it, or tap on Share to share this video.
There you have it. Now you know how to blur text and faces in iPhone videos.